It always easy to take a screenshot on a Mac. We can take a screenshot of an entire desktop or an active window. In this post, we will talk about the built-in screenshot taking options right into the Mac OS without requiring any additional software.
We can use COMMAND+CONTROL+SHIFT+4 to capture a part/portion of the desktop. A cross-hair cursor will appear for selection. We will be able to click and drag to select the area that we wish to capture. A screenshot of PNG file will be saved on the desktop once we release the mouse. The esc key can be used to turn off the cursor.
By pressing COMMAND+SHIFT+4 then SPACEBAR, we can capture a specific application window on the screen. The cursor changes to a camera and can be dragged around the screen. Once we move the camera faced curson on a application window, the window becomes highlighted. It will be available to click and capture as a PNG/PDF file, even when the whole application window is not visible. The esc key can be used to turn off the cursor.
We can capture entire desktop by pressing COMMAND+SHIFT+3. The screenshot will be saved as a PNG file. If we need to use this screenshot into another program, we can copy it to the clipboard for immediate use by pressing COMMAND+CONTROL+SHIFT+3.
Another method for capturing screen shots in Mac OS X is by using the bundled Apple utility, Grab, located in the Applications > Utilities folder. It can save screen in TIFF format and can include cursor or a menu in the screenshot. To include a cursor, go to Grab Preferences and select the desired cursor icon to have in the screenshot. To capture the screen with Grab, run Grab, then choose one of the capture modes from the Capture menu: Selection, Window, Screen, Timed Screen.
By choosing the Selection mode in Grab, we can capture a specific region of the screen by dragging around it. Grab will display a tooltip showing the size of the region is selected and the screen shot will open in a window after releasing the mouse button. Cursor will not be included by this method. Below is the screenshot that will be seen while using this mode.
By choosing the Window mode in Grab, an instruction window will appear asking to select the window to capture, then click the Choose Window button. Once the button is clicked, the instructions will disappear and the clicked window will be captured, including the mouse cursor at the position where was clicked if a cursor is selected from the Preferences menu. Below is the instruction window for this mode.
By choosing the Screen mode in Grab, an instruction window will appear asking to click the screen to capture. The mouse cursor will be included in the screenshot at the position where was clicked if a cursor is selected in the Preferences menu. Below is the instruction window for this mode.
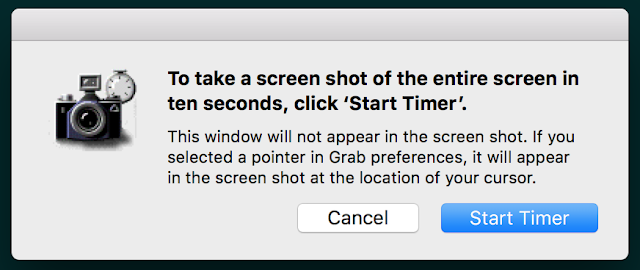
By choosing the Timed Screen mode in Grab, an instruction window will appear, allowing to prepare the screen for capture, press the Start Timer button. There will be ten seconds before the screen is captured. This mode allows to open menus or sub-menus as required. After ten seconds the entire screen will be captured. The mouse cursor will be included in the screenshot if a cursor is selected in Preferences menu. Below is the instruction window for this mode.


No comments:
Post a Comment